An Arduino Uno combined with a multi-function shield makes a great inexpensive starting point for projects. I had an extra Arduino-compatible laying around so picked up a multi-function shield with the idea to use it as a teaching tool. It has a 4-digit 7-segment display, a buzzer, three pushbuttons, a trimming pot, and a number of headers for attaching additional things like up to three servos. That provides lots of opportunities to dabble and learn how to control physical hardware with Arduino code.
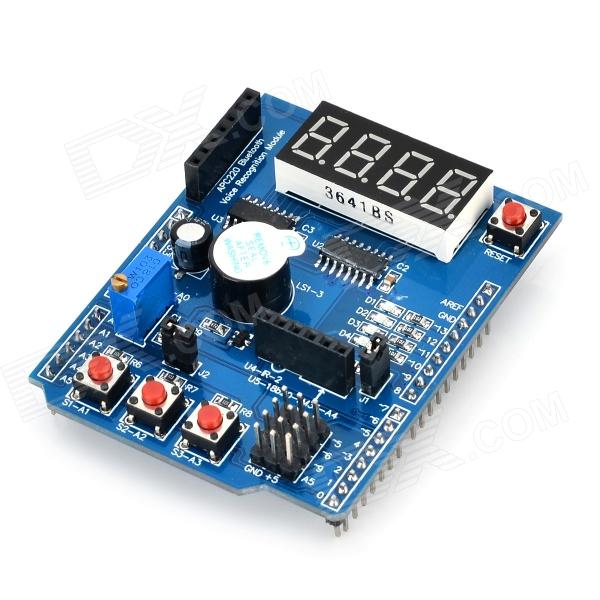
Arduino Multifunction Shield
I originally had just a vague idea of how I would use the Arduino + multifunction shield for teaching purposes. But then I decided to combine it with a project I was contributing to on Hackaday.io. The project started out as something called Cardware (which has since evolved quite a bit). The concept is that there are lots of hobbyist robotics components available like servo motors, controllers, sensors, etc. But to put together a complete robot of any kind you have to either buy an expensive kit (which may not even be available depending on where you live, e.g. Amazon does not ship to Thailand) or have the tools and expertise to fabricate something like 3D printed or laser cut body components. The talented project owner of Cardware developed plans for folded card stock as the body components in which servos could be mounted and then the components assembled into a complete robot.
More details on the development of Cardware will be in another blog post. Now I will just jump to the finished result of combining Cardware with an Arduino Uno + multifunction shield.
I introduced this to the teacher who runs the coding club at my kid’s school. They are already using Code.org to teach primary school kids coding. The kids in the club make art and games using Blockly. Adding a real world physical component like this gets kids excited and is what makes robotics such a great way to inspire young learners. There are many kits available targeted at that space. But I like this approach because it is much more DIY. It is more challenging than snapping together pieces of a kit so more adult help is needed. The Arduino can be programmed using a Blockly-like tool within the Arduino IDE. So kids can actually program the robot arm to move the way they want it to.